Quick Links
Doom 3is a classic first-person shooter that takes place on Mars. It is a challenging game and nearly impossible to beat in a Nightmare campaign. Luckily, the game designers left supplies and ammunition lockers scattered throughout each level. These life-sustaining caches provide precious ammo, armor, and health packs that give us a fighting chance to escape the Red Planet.
Most lockers need an access code to get the goods, and some codes can be reused on other lockers. To make your survival a tad bit easier, the codes for each locker on every level are provided below. Now get goin’, Marine!
Mars City
Maintenance Bay
After following the sentry bot from Marine Command tothe Maintenance bay,Locker 001 will be visible from the entry door. It is in the far right-hand corner of the maintenance room. Take the stairs down to the lower floor, turn right, and head up the small set of stairs.
Locker 001will be right in front of you. Usecode 3-9-6to open the locker containing ammunition for a pistol you haven’t received yet.

If you don’t access Locker 001 on the first pass before all hell breaks loose,you will see it again on your way back to Marine HQ. However, it will already be open and may not have anything in it.
Mars City Sub System (Mars Underground)
Energy Stabilization Unit
As you enter theEnergy Stabilization Unitfrom Convergence Chamber 1,turn right and follow the hallway until you see the next door. Before going through that door, look left, and you will see a small alcove with a storage locker.
Locker 023is on the far wall next to a storage crate. The PDA on the storage crate will give youcode 5-3-1to open the locker, which contains some shotgun ammo, armor shards, and a med pack.
You shouldn’t need a med pack yet unless you hurt yourself walking. The armor shards will boost your armor level.
Underground Security Checkpoint
This is where you were first issued your armor, pistol, and ammo. You will come back to this security room to unlock the door using the computer terminal. While on the computer, move your cursor to the banner that says"Mars City Sublevel Access". This will bring up a menu with six options.
Select"Entrance Lockers"and you will see a screen that shows the status of Locker 1 and Locker 2. Locker 2 is already unlocked and empty, soselect “Locker 1” to open the glassenclosure. Exit the security room and circle to the left to access Locker 1.
Doing this gives you the machine gun earlier than you would normally get it, which means killing the baddies just got better!
Infirmary
As you enter the Infirmary, Locker 017 is visible along the left wall. Usecode 3-4-7to open it. The locker contains armor, a med pack, and ammunition for your machine gun and shotgun.
Also, there’s a health station on the wall across from the locker.
Marine Command
ReachingMarine Commandis your current objective. Once you arrive, Sergeant Kelly will pop up on the screen and give you a new mission.
Across the hall from Marine Command is the Weapon Storage Room. Usecode 5-8-4to open the door to the armory. This room contains armor, med packs, and ammo.

UAC Administration
Alpha Labs Hallway
As you enter theAlpha Labs Hallway, turn right and follow the hallway untilit turns slightly to the right again. You will see an office to your front. Enter the office and look toward the back left corner of the room. There you will seea door with Locker 013 next to it.
Usecode 5-8-6to openLocker 013. Inside you will find armor, grenades, and ammunition for your shotgun and machine gun.This is your first issue of grenades!

These grenades have athree-second fuse, but they will explode upon impact with an enemy. Also, it is possible to hold a grenade until it explodes.
North Hallway
As you enter theNorth Hallwayfrom the Data Library, go up the stairs and turn left down the hallway. Take the first right and walk straight until you enter a small office.On the far right wall of the office, you will see a Martian Buddy Storage Locker.
These lockers are not numbered like the others, butall Martian Buddy Lockers share the same code: 0-5-0-8.Use this code on the few Martian Buddy lockers found throughout the game.
This locker gives you a Gatling gunand a small amount of ammo. But don’t worry, you’ll find tons more ammo as you progress. If you need health, there are med packs on the desk across from the locker.
Alpha Labs Sector 1
EPD Lab
Toenter the EPD Lab, jump through the large windowfrom the EPD Observation Platform. After killing the demons that spawn at your arrival, walk behind the EPD laser and head upthe short staircase in front of you.
As you traverse the stairs,Locker 009will be directly in front of you on the far wall. Usecode 7-5-2to open the locker, where you will find some armor, grenades, machine gun ammo, and two health packs.
Alpha Labs Sector 2
MFS Compressor (lower level)
As you enter theMFS Compressorroom, you will notice immediately to the righta conveyor machine that is transferring canisters of blue plasma.
Now, look beyond the machine, into the far right corner of the room. There you will see Locker 038. To get to it, justjump over the railingafter a plasma canister goes by, then walk across the conveyor.
Usecode 4-0-9to openLocker 038. It has armor and some ammo.
Coolant Control Junction
As you reach the end of the Coolant Control Junction’s lower level, you will seea ladder in the middle of the room. Climb that ladder and look behind you.
You will seeLocker 039, which opens usingcode 1-0-2.It contains armor and machine gun ammo.
Alpha Labs Sector 3
The head honcho forAlpha Labs Sector 3did you a solid by making all the locker codes in his area the same. What a guy!
Usecode 1-2-3forLockers 047, 048, and 049, which are all in Alpha Labs Sector 3.
After leaving the airlock, follow theAL2 Main Engineering Junctionto the small flight of stairs. Go up the stairs and straight to the first room on the right, which is theHazardous Waste Disposalroom.
Use thecrane controlsin that room tomove the waste barrelsto the incinerator in the adjacent room. Once complete, exit the HAZMAT disposal room and hang a right. Follow the hallway around to the right, then go up the stairs. You will see the door to the next room.
In the hallway, between the crane control room and the HAZMAT room with the toxic barrels,there is a Health Station. Keep that in mind because you will be attacked frequently in this hallway.
Hazardous Materials Lift
After disposing of the toxic barrels, this room will become accessible. As you enter, headstraight through the double doors on the far sideof the room to access the lift area.
As you enter the Hazardous Materials Lift room, thestorage locker is centered on the far wall. Take the small stairs to the right and follow the platform around to the left.
Usecode 1-2-3to openLocker 047, which has machine gun ammo and grenades. Don’t forget to snag the health pack and Gatling gun ammo on the trolley by the stairs.
If you need armor, call the lift using the lift access station, kill the dudes on the lift, and snag the armor set. Also,don’t forget to grab the key cardon the floor in the Hazardous Waste Disposalroom you just came through. You will need that key card to access Maintenance Area 4.
Coolant Monitoring
For entry into this room,scan the key card you found on the floorin the hazardous waste disposal area. As you enter, turn left and dispose of the demon spawn and giant spiders that appear in waves.
Once the area is clear, move down the hallway until the room opens up, then look to the right. On the far wall near the computer terminal in the corner, you will seeLocker 048. Usecode 1-2-3to open it and grab the health pack and plasma cells inside.
Also, next to the computer terminal is a set of armor and machine gun ammo.
EFR Staging Room 1B
As you near the end of Alpha Labs Sector 3, you will come to theHeavy Water Runoffroom. After clearing the room, you’ll have tojump through a windowto access the EFR Staging Roombecause the door is broken.
The first time you attempt to go through the window, a demonic force will push you backward. Your next attempt will be successful. As you enter the room, look to the right.
On the far right wall of the lower platform, you will seeLocker 049. Usecode 1-2-3to open it. Grab the armor shards and ammunition.
Alpha Labs 4
To access the one locker in Alpha Labs 4, make sure youselect the “Extend Service Bridge"optionwhen you get to the EFR Staging Area. This will extend bridges throughout the complex andlead you to the EFR Master Valve room.
EFR Master Valve
When you cross the last bridgefrom the EFR Main Conveyor, you will enter the EFR Master Valve room. You will be on the lower level as you enter, sotake the ladder on the far side of the roomto the next level.
As you come off the ladder, look to the right, and on the far wall isLocker 064. Usecode 6-5-1to open it. The locker contains plasma cells, machine gun ammo, and armor shards.
Enpro Facility
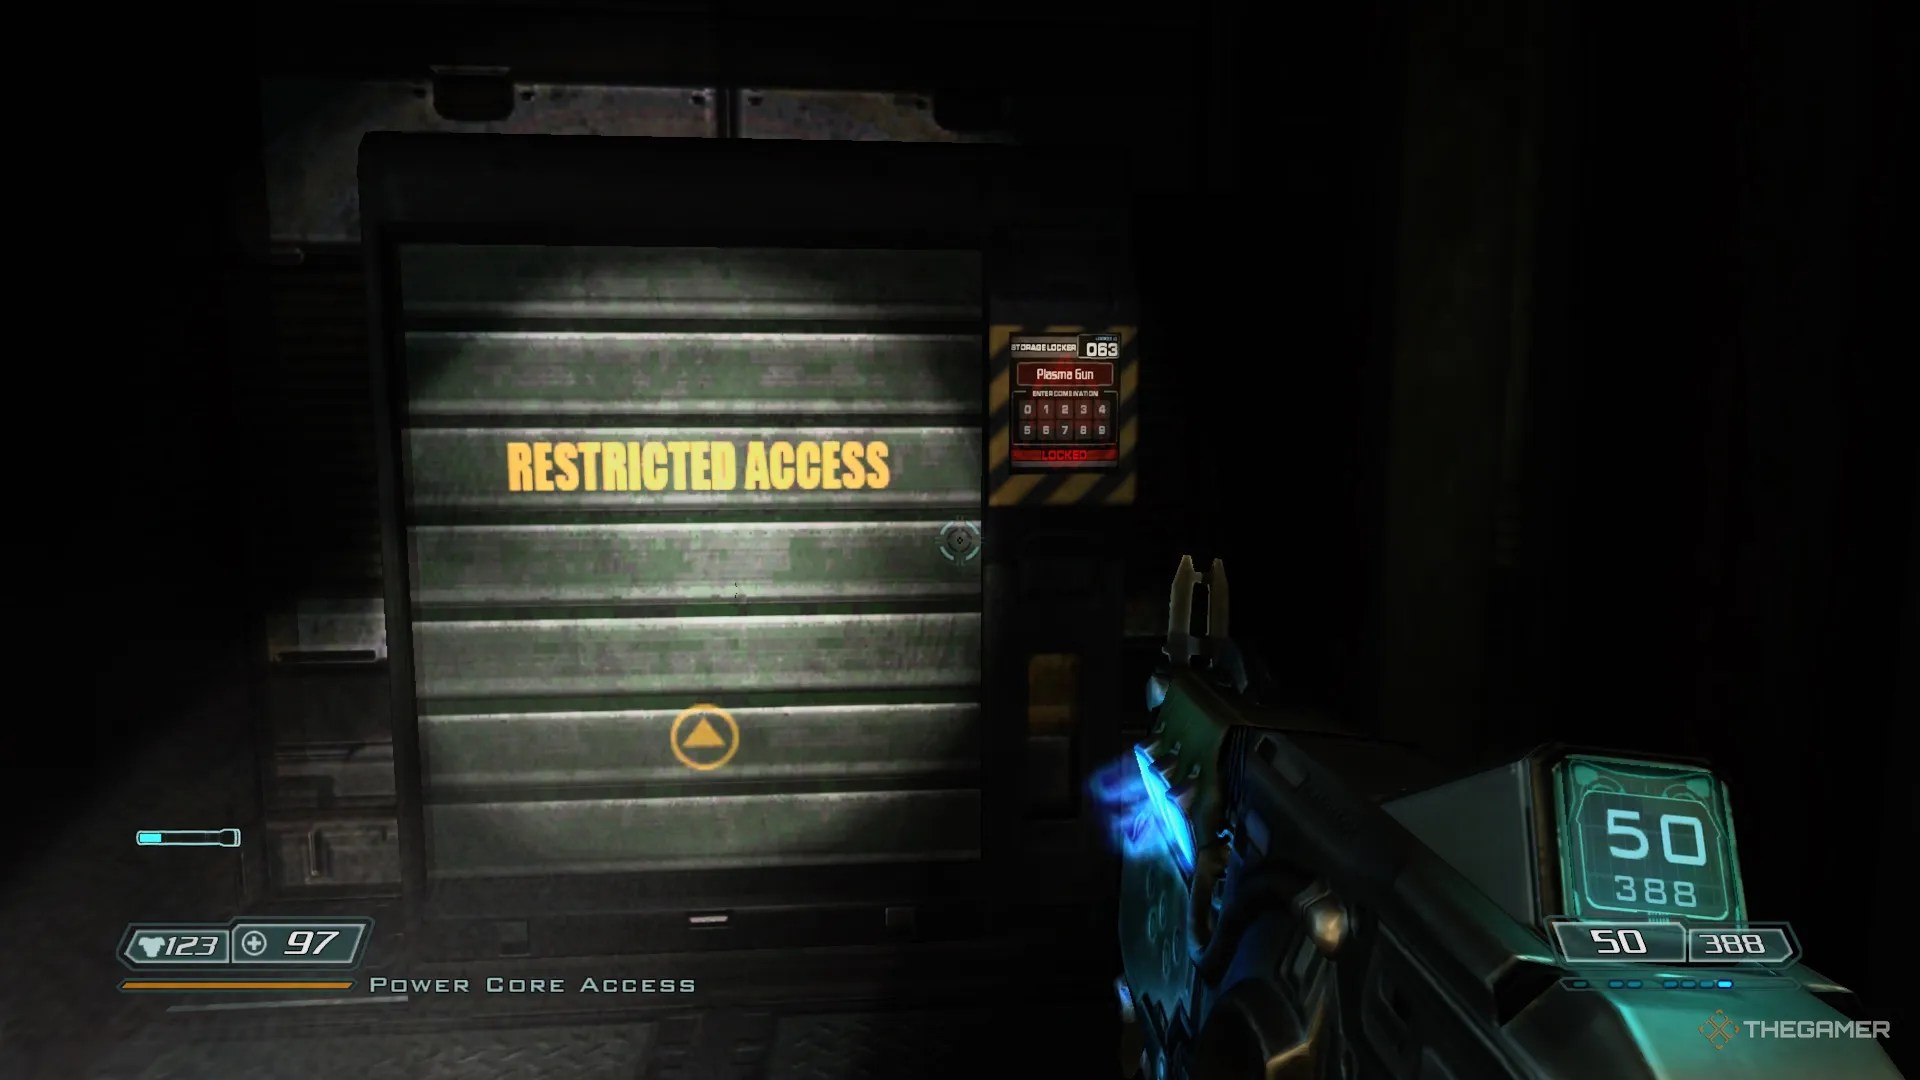
Power Core Access
Upon entering thePower Core Accessroom, look to the right, and behind a large, fenced-in pipe there is a ladder.Take theladder to the upper level.
At the top of the ladder, follow the platform around to the right, and you will come to a door on the right. Immediately to the left as you enter the room isLocker 063, which opens withcode 9-7-2. The locker contains a health pack, a plasma rifle, and some plasma cells.
In the room with Locker 063, use thecomputer terminaland select"Unlock Door Release Bridge"to extend the bridge on the upper level. You will not progress without doing so.
Maintenance 3
As youenter Maintenance 3, turn left and go down the stairs to the next platform. Then turn right and go down another set of stairs. Look slightly to the right, between two columns, andyou will see the door that says Plasma Storage.
While this is not “technically” a locker, the Plasma Storage room has a couple of med packs, some armor, a plasma rifle, and a boatload of plasma cells. Usecode 7-3-4to open the door and stock up on plasma cells before heading to the next level.
Communications
Security Office
As you enter the Security Office, turn to the right, andyou will see a health station andLocker 054along the wall closest to the door. Usecode 2-4-6to access the armor, grenades, and shotgun shells inside.
Use the computer terminalin this room to“Activate Sentry”, which produces a sentry bot. You won’t be able to advance to the next area without the robot’s clearance.
Recycling 2
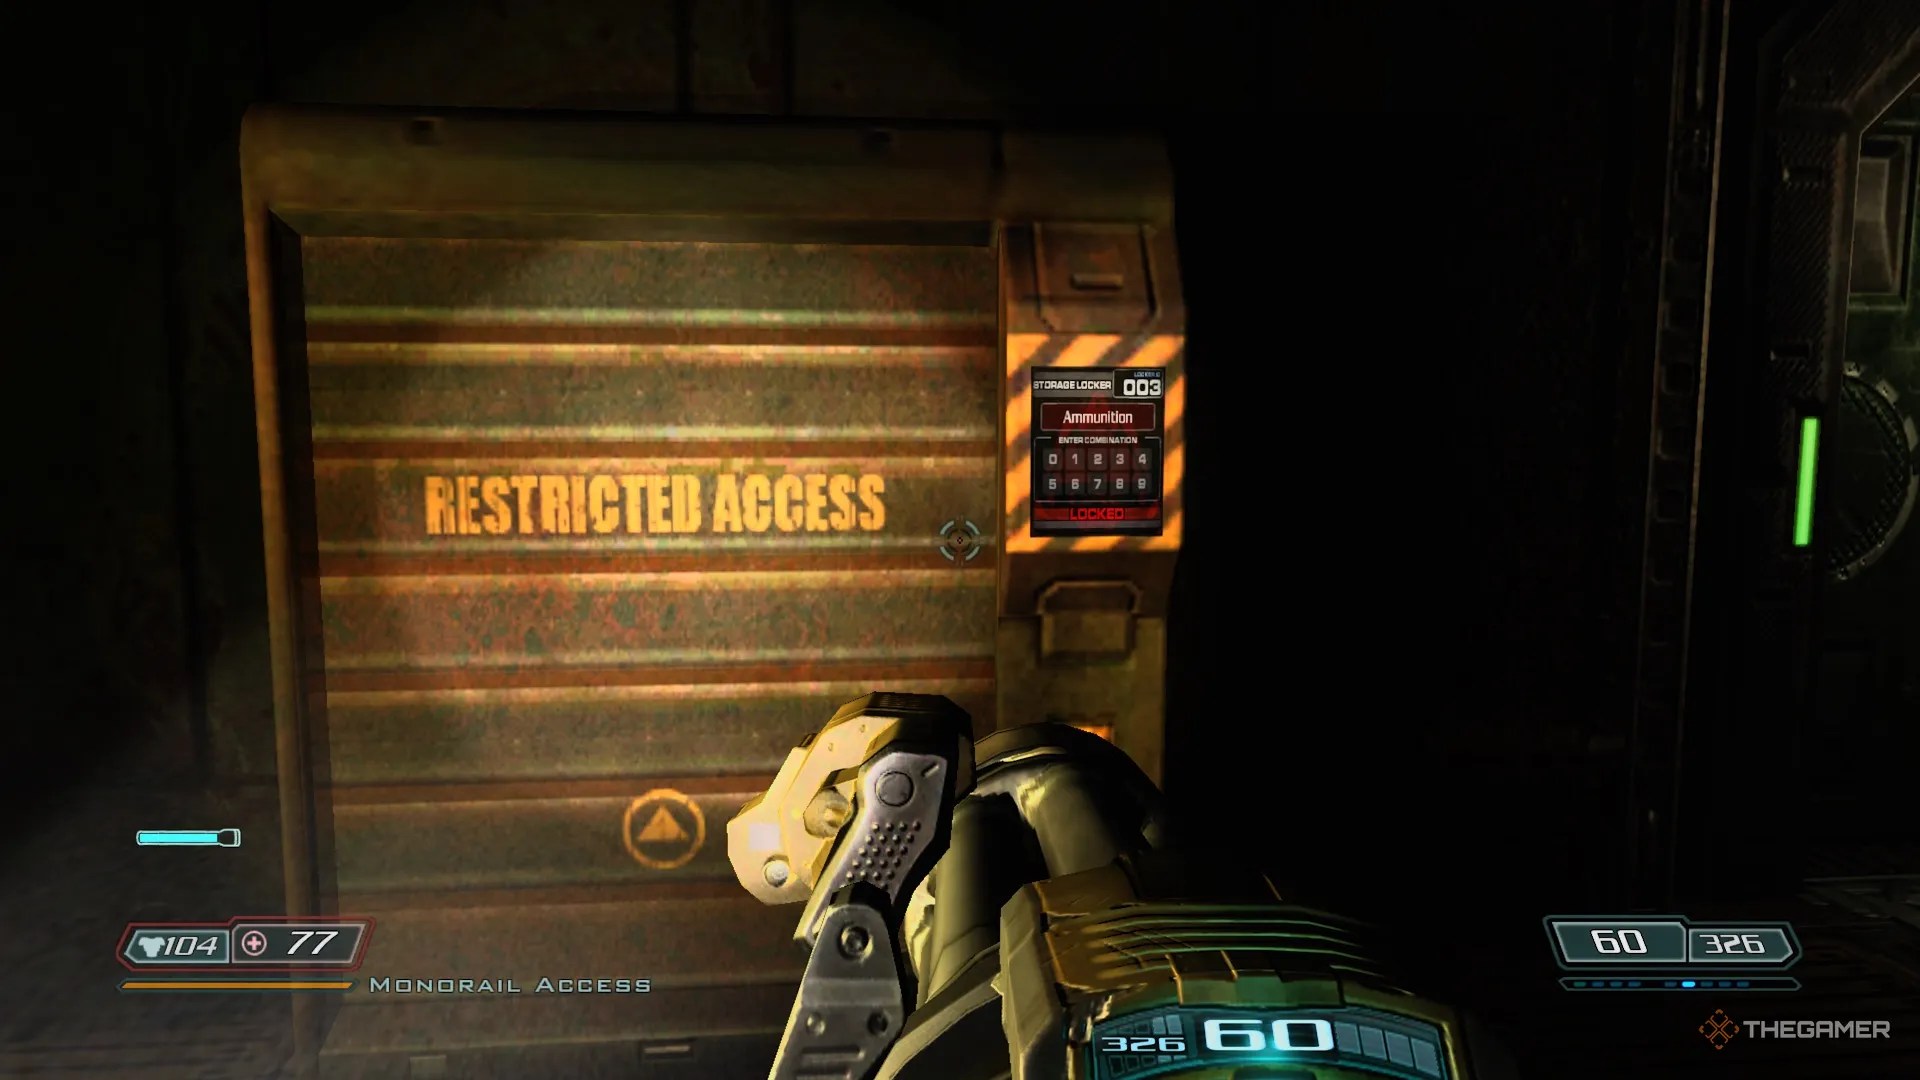
Monorail Access
When entering theMonorail Access room from Hall 1B, turn right and follow the wall. You willsee Locker 003 to the right along that wall. If you hit the monorail airlock, you’ve gone too far.
OpenLocker 003withcode 4-8-3to obtain ammunition for your shotgun, machine gun, and other supplies.
Monorail
Recycling Facility Boarding Platform
As soon as you leave the airlock to the Monorail, turn right and follow the wall.You will see another Locker 003 next to a health station.
If you unlock Locker 003before the airlock, it will be open now. If you haven’t, usecode 4-8-3to open it. This one has armor, machine gun bullets, shotgun shells, and plasma cells.
Site 2 Boarding Platform
When you first come off the Monorail at the Site 2 Boarding Platform,wind your way through theSite 2 Transfer Area. Ascend to the highest platform of the transfer area, and you will come toa door that leads to the upper levelof the Site 2 Boarding Platform.
When you first enter the Site 2 Boarding Platform upper room,look left and you will see a health station. Just beyond that, in the left corner of the room, you will seeLocker 054.
Usecode 1-4-2to open this locker, which contains armor, rockets, and some shotgun rounds.
Before leaving this room, use the computer terminal and entercode 8-2-6to override theMonorail Airlock Controlsystem. The train won’t move without doing so!
Delta Security Checkpoint Storage
As you approach theDelta Security Checkpointarea, you will hear warning messages about theautomated gun turretsbeing online. These turrets kill anything, including you.
Upon entering the security checkpoint, there is a door directly across from you that doesn’t work. But just to the right of that door is apane of glass that has been destroyed, which allows you to enter the small security officenext to the metal detectors.
Once inside, go through the doors immediately to the left, the Delta Security Checkpoint Storage room, and you will seeLocker 078andLocker 079. Usecode 3-6-4to open both of them. These lockers provide armor, a med kit, and munitions for your machine gun, shotgun, and plasma rifle.
It is advisable toshut down the automated turrets before proceeding. To do so, exit the storage room withLockers 078 and 079, and move to thecomputer terminalstraight ahead. Use your cursor to select the option that deactivates the turrets.
Delta Labs 1
Storage Room 21-D
To get toStorage Room 21-D, you’ll have tocrawl through a ventilation duct from the Delta Service Warehouse. The duct is on the floor to the right of an inoperable garage door.
Once you’ve crawled through the vent, you will emerge into Storage Room 21-D. Directly in front of you will be a door with astack of three explosive barrelsnext to it. That door is your exit. Using the crate at your feet, hop out of the ventilation duct.
Once you’re out of the ventilation duct, pan right, and you will seeLocker 21D. Usecode 2-9-8to unlock it. The locker contains two sets of armor, a med pack, some shotgun shells, and rockets.
Delta Labs 2A
Records Office
As you enter theRecords Officefrom the front hallway, you will snake your way to the left andthrough the cubicles. Kill all the baddies along the way until you reach the far side of the Records Office.
Along the far wall, just before the door to the Office Hallway, you will find two storage lockers:Locker 112 and Locker 113. Locker 113 has already been opened for you. Usecode 5-3-8to openLocker 112.
Delta Security Junction
As you round the corner to the left at theDelta Security Junction, you will see theoffice of M. Abrams. This office doesn’t have a locker, per se. But it does have thefirst BFG available in the game!
Usecode 9-3-1to unlock the office of M. Abrams. The BFG is encased in glass to the right as you enter, which you canopen using the terminal on the wall next to the display.
Delta Security
After leaving the office of M. Abrams, hang a left and follow the hallway to the next room, which is Delta Security.Locker 116 is along the far wall to the leftas you enter, just across from another door.Locker 116opens withcode 9-7-2.
Operations Server Room
As you enter,there are two storage lockers on the left wall: Locker 114 and 115. Locker 115 is already open. Taped to the side ofLocker 114is a sticky note withcode 7-1-5. Use that code to open the locker and restock your gear.
The Plasma Inducerneeded for your current objective isdirectly across from Locker 114. Snag it and take it back to the scientist, I. McCormick.
Delta Labs 2B
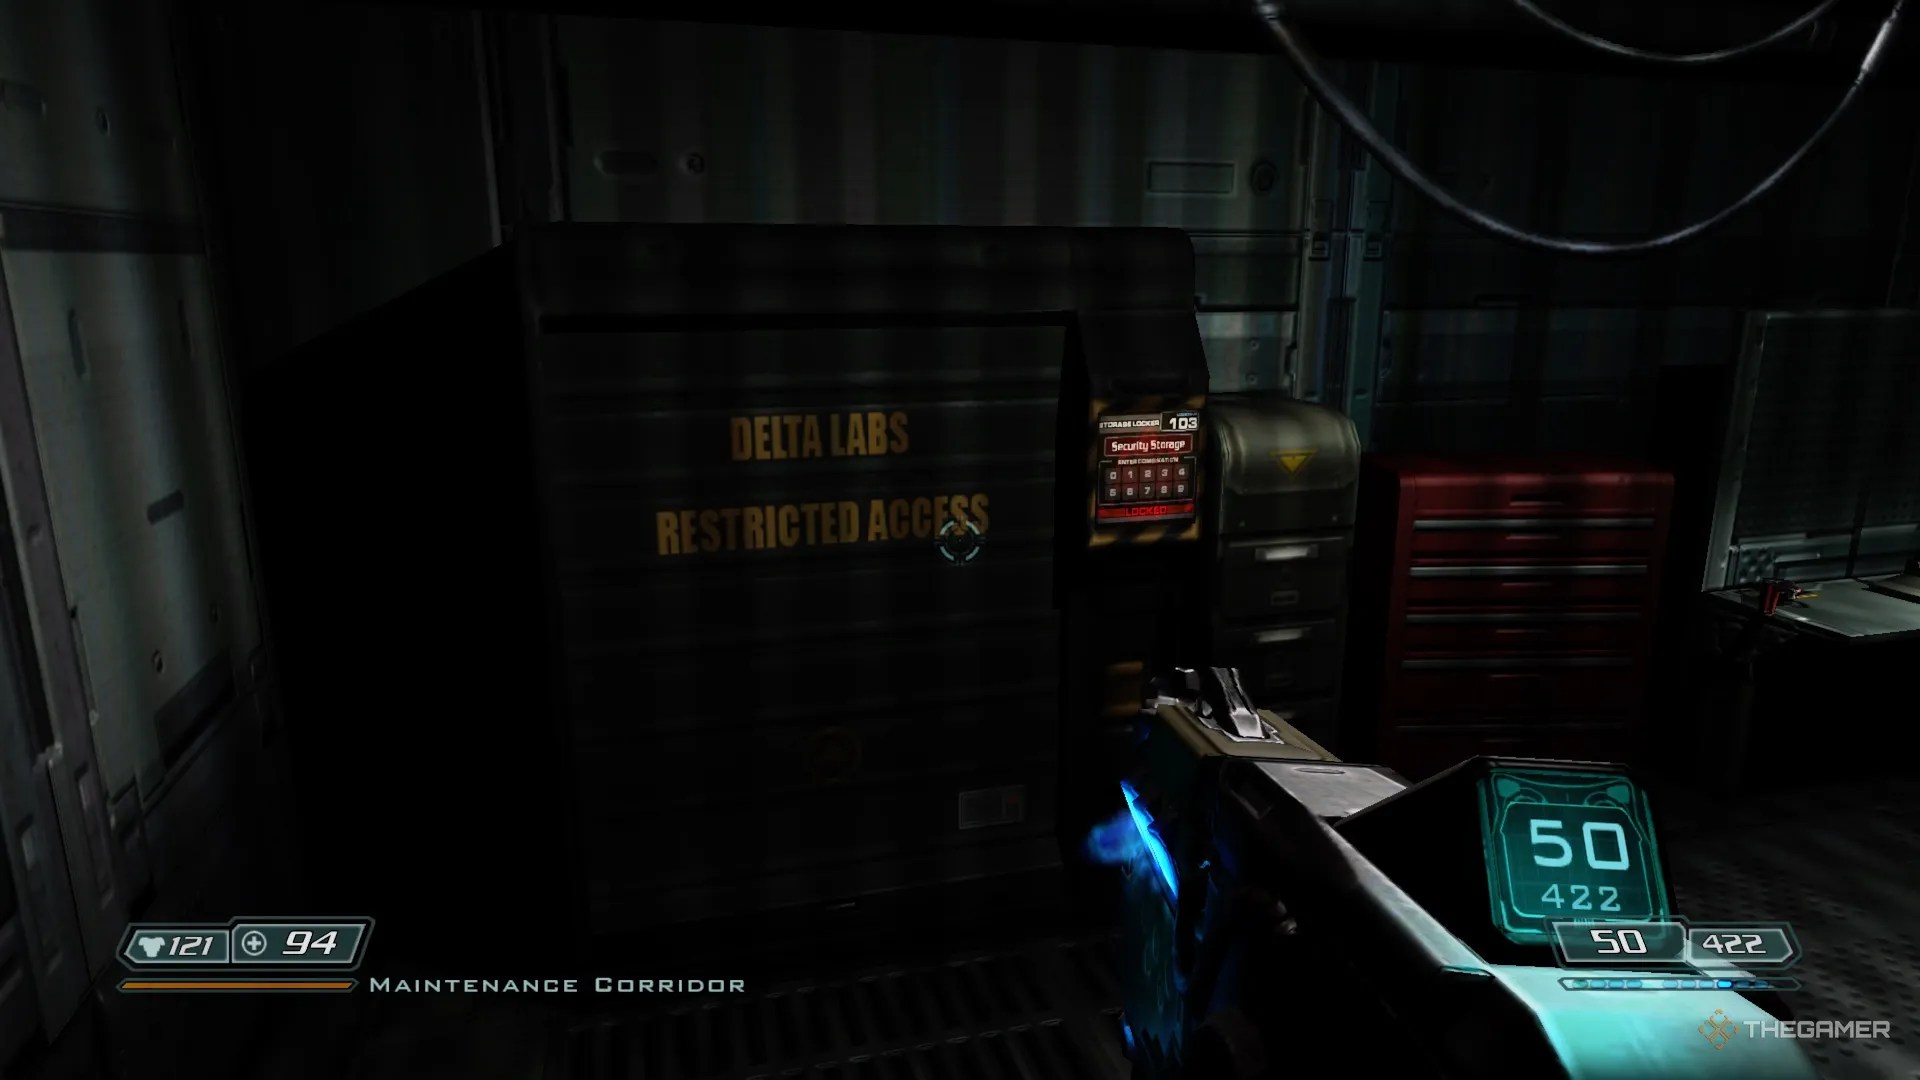
Maintenance Corridor
After leaving theData Control Terminal, you willenter the Maintenance Corridor. Follow this hallway around to the left, and immediately on the left is a set of stairs. Centered at the bottom of those stairs isLocker 103. Usecode 2-5-9to access the rockets, plasma cells, and med pack inside.
Don’t forget to snag the PDA on the desk to the right of the locker. You will need its credentials to open the next door.
Specimen Research Lab
Aftercrawling through a ventilation duct, you will drop into theSpecimen Research Lab. The scientist there provides thecode 6-2-4for the storage lockers in the next room.
Follow the room around to the left andLocker 216andLocker 217will be right in front of you. These lockers contain armor, plasma cells, grenades, and BFG rounds.
After getting the locker code from the scientist,do notgo to the right and jump over those boxesbefore opening the lockers. Once you go over those boxes, the wall collapses, and you won’t be able to go back.
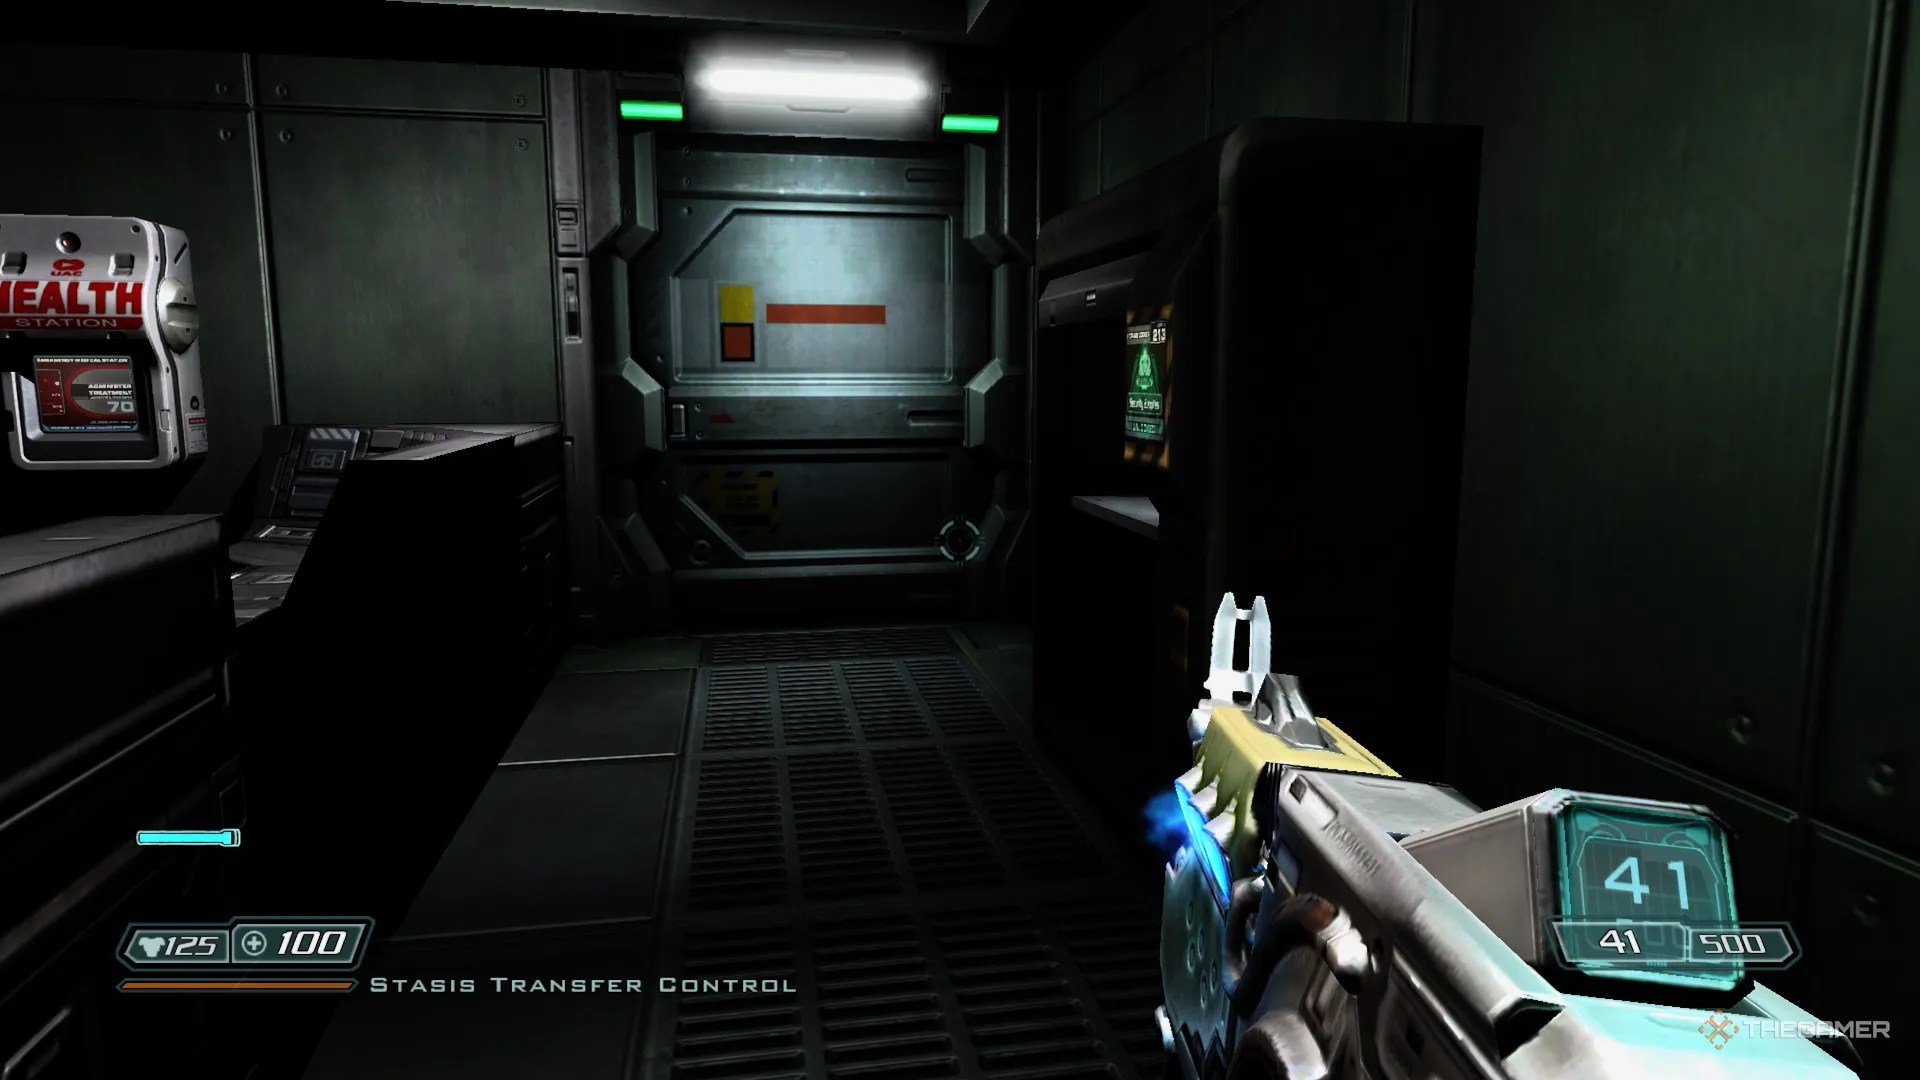
Stasis Transfer Control
Afterfollowing the conveyor inside the Stasis Transfer room, you will come to some stairs that lead to the Stasis Transfer Control room. As you enter this room,Locker 213is on the right,against the wall and across from the control center. Usecode 3-7-1to open it. The locker contains ammunition for your machine gun, plasma rifle, and shotgun.
There is a health station to the left as you exit.
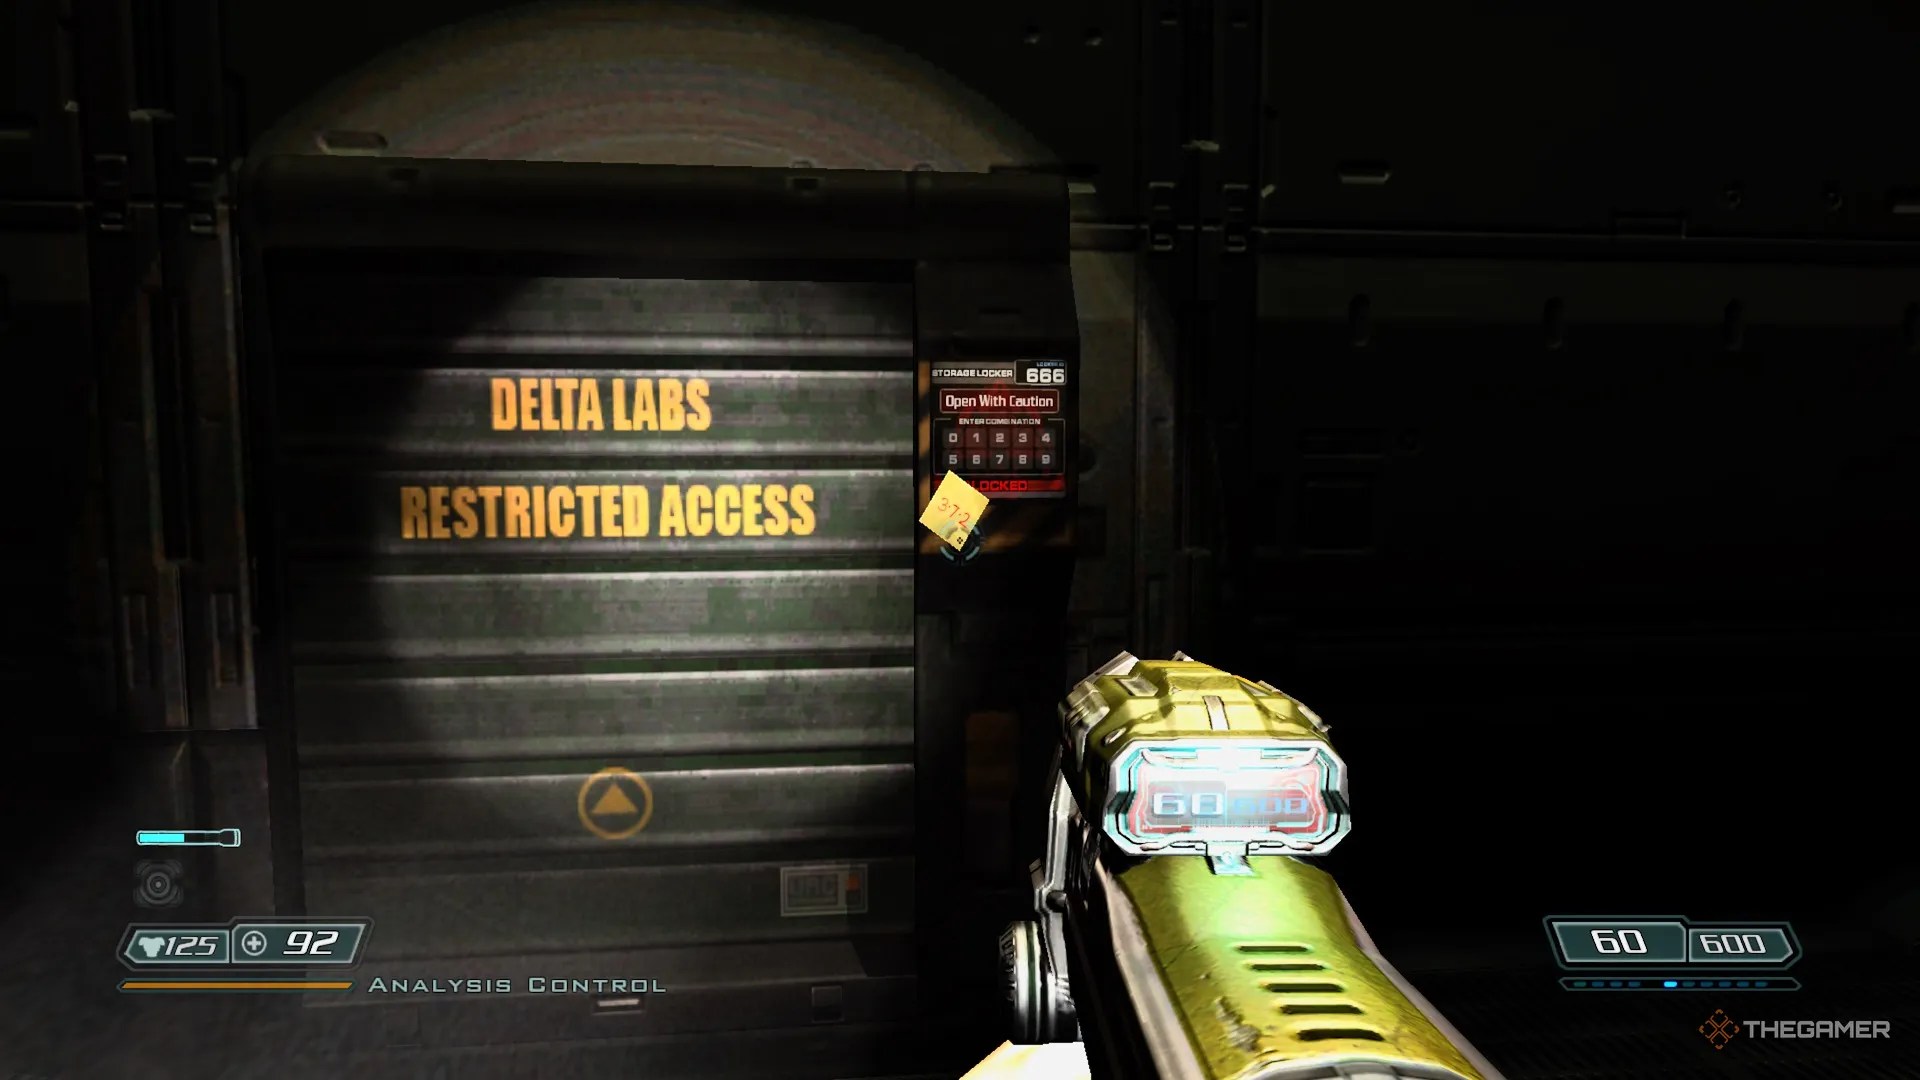
Analysis Control
Upon entering theAnalysis Control room, take the first right down the stairs, and along the wall on the right will be another locker. It is here that you will findStorage Locker 666, which hascode 3-7-2taped to it.
You’ll get more than you bargained for, so use caution when opening this one!
Central Processing
As you enter theCentral Processing room, hang an immediate right and follow the wall until you come to thelocked door of the Secure Storage room.
Also known asStorage Area 07, gain access to this room by usingcode 7-2-5. Once inside, you will see a health station to your front, and on the right is the only otherMartian Buddy Lockerin the game.
As with the first one, usecode 0-5-0-8to open it. The locker will give you some armor and a BFG. In thestorage area across from the locker,you will find armor, grenades, and various munitions.
Delta Lab 3
T1 Access
After going through thefirst decontamination chamber of Delta Labs Sector 3, you will enter room T1 Observation - Lower. If you turn right, you will see another door. Go through that door into the T1 Access room.
The only things in this small room areLocker 386andLocker 387. They are on the wall opposite the door you just entered.
Usecode 8-3-6to open both lockers. Between the two of them, these lockers provide armor, health packs, grenades, rockets, and ammo for your machine gun and Gatling gun.
D3-1 Storage Room
You will have to teleport into this room. The first door to the D3-1 Storage Room you pass will be inoperable, so you will have touse the teleportation stations found throughout this levelto access it.
Follow thisteleportation sequenceto arrive at the D3-1 Storage Room.
First, fight your way toTeleport Station 1. Once you arrive, find the computer terminal that controls the teleportation machine. Teleport Station 1 has two destinations: Pad 1 Main and Pad 2 Balcony.Choose Pad 2 Balcony, then fight your way to the next teleportation machine.
Teleport Station 2offers three destinations: Pad 1 Main, Pad 2 Hallway, or Pad 3 Storage.Choose Pad 3 Storage. This brings you to the D3-4 Storage Room, which does not have any storage lockers. Fight your way to the next teleportation machine.
Teleport Station 3has four destinations: Pad 1 Exit, Pad 2 Security, Pad 3 Storage, and Pad 4 Hallway.Choose Pad 3 Storage again. This brings you to the D3-1 Storage Room that contains Locker 317.
When you teleport into D3-1 Storage,look to the right of the teleport pad you’re standing on, and you will seeLocker 317inside a fenced-in area. Usecode 8-4-1to access the locker and obtain armor, health packs, rockets, and ammo.
Delta Labs 4
Delta 4 Security
From the airlock that brings you toDelta Labs Sector 4, follow the hallways and junctions until you get to theDelta 4 Main Ready Room. Follow the hallway to the left, whichbrings you to the door of Delta 4 Security.
Locker 104is centered on the far wall across from the door. You’ll see it as soon as you walk in. Usecode 5-7-9to open the locker. It contains some armor, rockets, and Gatling gun ammo. If you need some health, there is a health station on the wall next to the locker.
CPU Complex
Entrance Checkpoint
Aftertransferring from Delta Labs 4 to the CPU Complex, the hallway you enter will bethe Entrance Checkpoint. Follow the hallway around to the left andstop just short of the broken security door.
Look left and you will see a small office. Enter that office and immediately look left. You will seeLocker 452, which opens usingcode 5-7-1. Grab the rocket launcher, rockets, and grenades contained within.This is the first rocket launcher you get after returning from Hell!
Also, thedesk to the right of Locker 452has some ammo and a shotgun.
Main Entrance Hall to Lab A
Follow theMain Entrance Hallto the left as you exit the Entrance Checkpoint, or straight if you’re coming from the Security Monitoring room.Follow the hallway until it terminates at a security door. Entercode 6-2-7to open the door.
Lab A Upper Floors
There are at least 3 areas named “Lab A Upper Floors”, but the one that has the final two lockers is theuppermost Lab A Upper Floors. To get there,take every elevator upwardsfrom the Lab A Lower Floorslevel.
On each upward level, wind your way through the maze of server towers and demons to find the next elevator.Eventually, you’ll come to a room called “Lab A Upper Floor Offices”, which means you’re close. Wind your way through the offices until you reach another door that takes you to thefinal Lab A Upper Floorsroom.
As you enter this room,follow the hallway around to the leftand thenturn right when the hallway opensinto a larger room. On the far wall, you will seeLocker 009 and Locker 669.
Locker 009is already open and has two health packs, along with theReplacement Door Panelthat you need for your current objective.
OpenLocker 669withcode 4-6-8. It has armor, grenades, and plasma cells.
As soon as you grab the Replacement Door Panel,you will face an onslaught of demons and spiders, so grab all the gear before that happens!
Every Locker And Its Access Code
Those are the codes for all the lockers in the original Doom 3. Some are easier to find than others, but they all have the gear you need to fight through to the end.
As a quick reference, the following table lists all lockers,ascending numerically, with their corresponding access codes.
001
3-9-6
003
4-8-3
009
7-5-2
013
5-8-6
017
3-4-7
023
5-3-1
038
4-0-9
039
1-0-2
047
1-2-3
048
049
2-4-6
1-4-2
063
9-7-2
064
6-5-1
078
3-6-4
079
103
2-5-9
104
5-7-9
112
5-3-8
114
7-1-5
116
2-9-8
213
3-7-1
216
6-2-4
217
317
8-4-1
386
8-3-6
387
452
5-7-1
666
3-7-2
669
4-6-8
Martian Buddy
0-5-0-8
Locker 054 appears twice in the game, and both of them require different codes to unlock. The codes for both are included in the table below, along with the level of their location in parentheses. There are other examples of reused locker numbers, like Locker 009. In those cases, either the second locker is already open, or the same code opens both lockers of the same number, as is the case with Locker 003. Those lockers are only represented once on the table.
